 |
RADIOMARELLI RD
302 Italy - 1960 Restoration |
 |
|
|
|||
 |
 |
 |
 |
 The Radiomarelli RD 320 I got
my hands on had serial number 2344 on two labels, one glued to the
battery compartment and the other to the printed circuit board.
The Radiomarelli RD 320 I got
my hands on had serial number 2344 on two labels, one glued to the
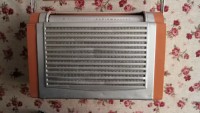
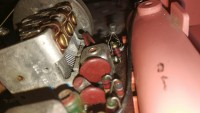
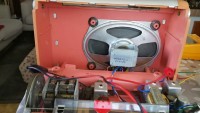
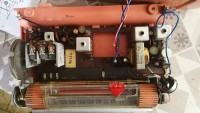
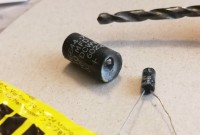
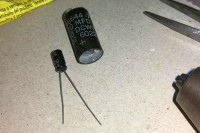
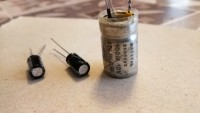
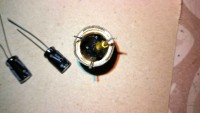
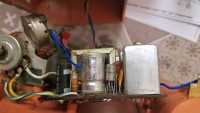
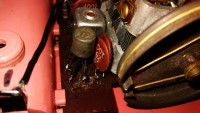
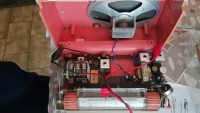
battery compartment and the other to the printed circuit board.The radio looked "used", the cabinet had dents on the aluminum grille covering the speaker, the color of the plastic parts was a bit faded and as soon as I opened it I noticed that someone had done some work on the electronic circuit. At first glance, in fact, some unsoldered wires could be seen and that the transistor TS1 (2N544) had been replaced with a more modern AF126 and that this work had been done in a less than "professional" manner. Replacing the 2N544 Radio Frequency Amplifier transistor with an AF126 was not a bad operation, in fact the sacred texts said the AF126 was compatible with the 2N544, unfortunately the intervention had been carried out without dismantling the printed circuit board from the plastic chassis, brutally cutting the leads of the defective RCA transistor and soldering the terminals of the AF126 on the remaining stumps. The other seven transistors and all the electrolytic capacitors still seemed to be the original U.S.A. ones, soldered by the workers of the Radiomarelli assembly line back in 1960. The radio was over sixty years old so interventions would certainly have been necessary, but first of all it was necessary to decide where to start. Examining the unsoldered wires I found that the blue one came from the switch, so I soldered it to the positive pole of the battery compartment. I left the other black and short one loose and connected my multi-voltage power supply regulated at 4.5 V to the battery terminals with crocodile clips. The Radiomarelli needed 6 V to work, so I didn't expect it to give any signs of life with four volts, but instead, as soon as I activated the switch-door, some faint crackles came out of the speaker. The result was encouraging and I immediately turned the volume knob, causing a crescendo of discharges. This was a positive symptom: at least the audio part was giving signs of life. I increased the supply voltage to 6 V and by turning on the tuning I managed to listen to a radio station between the discharges. You couldn't expect more from the old Radiomarelli which, among other things, still had that black wire disconnected, the result was encouraging and the radio deserved to be repaired. The first intervention was to replace all the electrolytic capacitors. I removed the PCB from the cabinet and started by unsoldering the C16 and testing it with my capacitance meter. Miraculously, the capacitance was still there but the ESR value and the residual resistance were very high. It was therefore necessary to replace the electrolytics, but it would have been a shame to solder modern components on the old circuit so, as I have already done with other "worthy" specimens in my collection, I decided to empty the old cases of their contents and insert the modern components that were much smaller. In the following photos you can see some phases of the work done: |
|||
 |
 |
 |
 |
|
As you can see, after carefully drilling
the capacitor casing with drill bits of increasing diameter, I adapted
the hole to the size of the component to be inserted, which I then
blocked in place with a few drops of glue. The most complicated task was
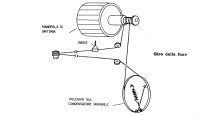
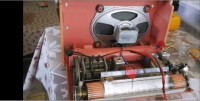
to "remake" the C17 which contained two 100 MF capacitors. Once re-soldered on the printed circuit board, the capacitors still seemed (and in fact were) the originals even though inside them there were now new components with the same capacity but with a much higher insulation voltage. After checking the continuity of the printed circuit tracks, I screwed it back onto the plastic shell and spent about ten minutes reassembling the tuning cord that had loosened when I had dismantled the chassis. Remembering the discharges heard when operating the volume knob, another necessary operation was to clean the potentiometer and the power switch with the appropriate deoxidizing spray. At this point I reconnected the crocodiles of my 6V regulated power supply and gave it voltage. By turning the tuning knob I could listen to three radio stations in Medium Wave, but the signal was not very strong and also the audio was distorted. |
|||
 |
 |
 |
|
 |
 |
 |
 |
|
Assuming that perhaps after
replacing the electrolytics some bias voltage in the Intermediate
Frequency stages had changed, I connected the
Heathkit SG8 signal
generator and performed the MF calibration at 455 kHz, without however
obtaining significant results except for the strengthening of the output
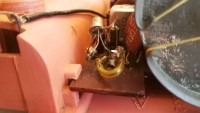
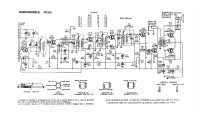
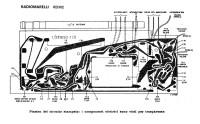
signal which remained distorted anyway. I didn't have many other actions left to do and one of these was to remedy the bad job done by who knows who when he had replaced the 2N544. Once disassembled and measured with the transistor tester the AF126 was efficient, but the appearance (the case) was different from the original RCA and the radio deserved to be restored to its best. Rummaging through my magic drawer I found an old AF117 that I had put aside after having "shocked" it with a 30 V discharge between the various leads and the screen to "burn" the famous internal lead whiskers that developed after years of use and caused internal short circuits in this old series of transistor. (More information in this link). Once measured, the AF117 was found to be efficient and without hesitation I soldered it to the stumps of the leads of the original 2N544 that were protruding from the printed circuit board. (I know it's a barbaric intervention, but I confess that I didn't want to disassemble the printed circuit board from the chassis again and then have to put the tuning cord back in place). Evidently the Radiomarelli RD 320 must have liked the AF117 more than the AF126 because, as you can hear in the video I inserted below, now the signal from the speaker came out strong and undistorted (electronic mysteries? No, maybe the guy who soldered the AF126 had connected the shield to ground incorrectly or done some other damage, the fact is that by using the AF117 and respecting the correct pinout as per the diagram the radio now worked fine). Once the remaining black wire was soldered to the earphone socket, the restoration was complete and after having locked it away in its faded orange cabinet, the Radiomarelli RD 320 became an honored part of my transistor radio collection. © IK3HIA, 2024. |
|||
 |
 |
 |
|
|
Return to top of page
|
|||
 Back to Description page
 |
|||
|
|
Return to: IK3HIA home page |
|
Return to: Transistor Radio |
|
Go to: Transistor diagrams |