 |
PYE P123BQ/R-L
- U.K. - 1958 - Restoration - Restauro - |
 |
 Restoration
 |
 |
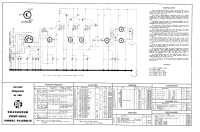
Restauro Schema elettrico |
|||||
|
|
|||||||
 |
 |
 |
 |
||||
 |
 |
 |
 |
||||
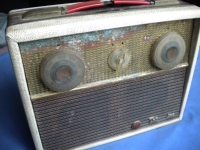
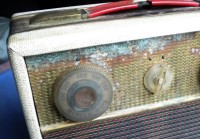
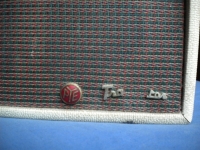
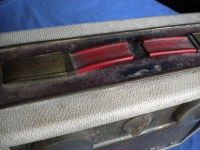
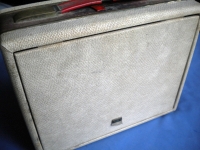
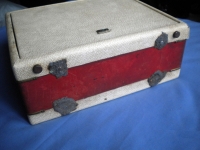
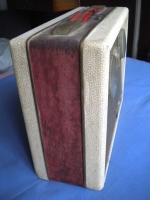
 L'esemplare di P123BQ pervenuto in mio possesso era in pessime
condizioni. L'aspetto esteriore era davvero scoraggiante: la parte metallica
frontale del mobile era deturpata da abbondante ossido di rame, le
manopole di plastica un tempo trasparente erano sporche, ingiallite e
con le scritte sbiadite, al logo "Transistor" in basso mancava la parte centrale,
in certi punti la finta pelle che ricopriva il legno era staccata, la plastica
rossa della maniglia per il trasporto era rotta in mezzo e i
quattro piedini di gomma sotto il mobile sembravano disciolti e ridotti
a una poltiglia nera attaccaticcia.
L'esemplare di P123BQ pervenuto in mio possesso era in pessime
condizioni. L'aspetto esteriore era davvero scoraggiante: la parte metallica
frontale del mobile era deturpata da abbondante ossido di rame, le
manopole di plastica un tempo trasparente erano sporche, ingiallite e
con le scritte sbiadite, al logo "Transistor" in basso mancava la parte centrale,
in certi punti la finta pelle che ricopriva il legno era staccata, la plastica
rossa della maniglia per il trasporto era rotta in mezzo e i
quattro piedini di gomma sotto il mobile sembravano disciolti e ridotti
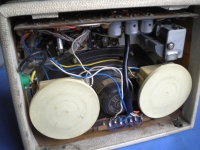
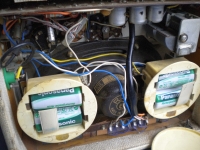
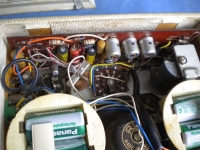
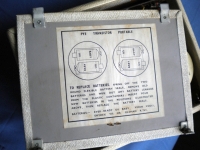
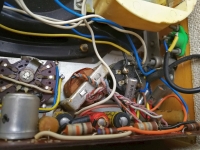
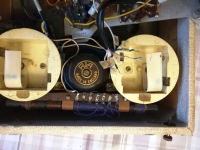
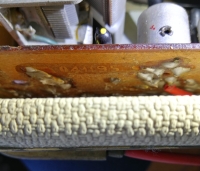
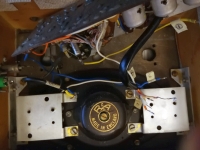
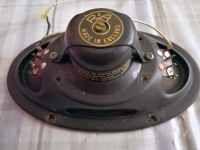
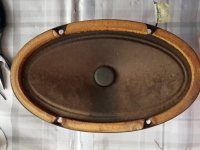
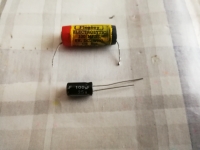
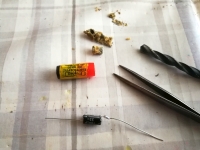
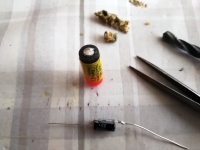
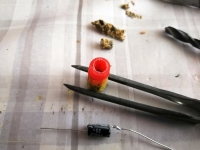
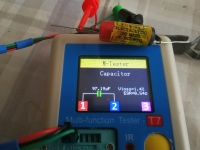
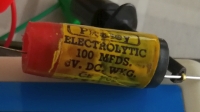
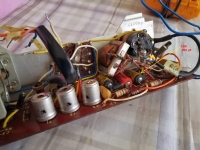
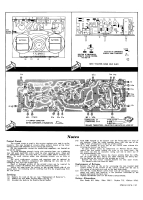
a una poltiglia nera attaccaticcia.La parte elettronica della Pye P123 invece appariva in condizioni un po' migliori. I componenti del circuito elettrico sembravano quelli originali e il venditore mi aveva assicurato che dopo aver provato a inserire le pile e aver azionato la manopola del volume era riuscito ad ascoltare delle scariche provenire dall'altoparlante. Una volta collegata al circuito una batteria da 6 V ho provato anch'io ad accendere e con sorpresa sono riuscito addirittura a sintonizzare una stazione in Onde Medie. Era un'ottimo risultato, ma la radio meritava di meglio, erano trascorsi ben sessantaquattro anni dalla costruzione e il mobile e certe parti elettroniche richiedevano assolutamente una revisione. Per fare un buon lavoro quindi bisognava estrarre l'elettronica dal mobile e restaurare entrambi. La disposizione delle parti era strana, con il circuito stampato posizionato in alto, l'altoparlante in mezzo e l'antenna su nucleo di ferrite in basso. Il tutto era collegato da innumerevoli fili di rame ricoperti in gomma colorata. Prima di iniziare il lavoro ho ripreso parecchie foto, ho fatto un disegno e ho attaccato delle etichette numerate ai fili per contrassegnarli, poi ho provveduto a dissaldarli e togliere le viti e i bulloni di fissaggio per separare le parti. Guardando il circuito stampato ho preso nota delle sigle dei transistor della Mullard e poi ho iniziato a dissaldare dal circuito stampato i condensatori elettrolitici della Plessey. Una volta misurati con l'ESR tester ho dovuto complimentarmi mentalmente con la ditta produttrice di tali componenti perché dopo tanti anni il valore della capacità era ancora abbastanza accettabile, non così la corrente di perdita, pertanto ho deciso che bisognava sostituirli con componenti nuovi. In tal modo però l'aspetto vintage dell'apparecchio sarebbe stato compromesso, perciò per salvare l'apparenza ho intrapreso la soluzione di bucare gli involucri dei condensatori originali e di inserire all'interno dei nuovi componenti dello stesso valore. A parità di valori le capacità più moderne erano molto più piccole di quelle antiche perciò l'operazione sarebbe stata difficile ma non impossibile. Con un po' di pazienza, utilizzando punte da trapano di spessore progressivamente più grosso sono riuscito ad estrarre il vecchio "elettrolita" e ricavare dei fori di diametro adeguato, in tal modo l'operazione "condensatori" è andata a buon fine e una volta risaldati i componenti sul circuito e ricollegati i fili tra le varie parti della radio ho acceso l'apparecchio. Con mio sommo piacere la Pye andava ancora, non avevo causato danni anzi, la radio riceveva benissimo, il volume sonoro era forte e la sensibilità molto buona. Non è stato necessario fare la taratura dei trasformatori di frequenza Intermedia, andavano benissimo così. A quel punto mi sono dedicato a restaurare il mobile. Usando uno straccio che intingevo di volta in volta in un piattino dove avevo preparato un amalgama di sale grosso, acqua e aceto, con tanta pazienza ho iniziato a strofinare la parte frontale metallica del mobile che avevo provveduto a staccare dal resto. C'è voluto parecchio "olio di gomito" per eliminare la parte fortemente ossidata, ma alla fine sono riuscito a togliere quasi del tutto la placca verdastra. Poi ho usato del detergente spray rubato alla mia consorte per pulire la finta pelle e ho usato della colla per riattaccare certe parti del rivestimento. Quattro tappi di gomma nera per sedie hanno preso il posto dei piedini originali e un po' di nastro isolante rosso è servito a incerottare in qualche modo la maniglia di trasporto. Rimaneva il fregio "Transistor". Beh, ammetto che il risultato non è stato esaltante, ma con un po' di plastilina autoindurente sono riuscito più o meno a ricreare le lettere "nsis" che mancavano e a colorarle con un pennarello dorato. La radio è vecchia ma è molto sensibile. La gamma delle Onde medie durante il giorno ormai è quasi deserta, ma sono riuscito ad ascoltare alcune stazioni. Di sera e di notte le cose migliorano parecchio e dall'altoparlante ellittico escono voci che parlano in molteplici lingue. © IK3HIA 2023 |
|||||||
|
|
|||||||
 |
 |
 |
 |
||||
 The P123BQ I found was in very poor condition. The
exterior appearance was truly discouraging: the front metal part of the
cabinet was marred by copious amounts of copper oxide, the once
transparent plastic knobs were dirty, yellowed and with faded writing,
the "Transistor" logo at the bottom was missing its central part, in
some places the fake leather covering the wood was peeling off, the red
plastic of the carrying handle was broken in the middle and the four
rubber feet under the cabinet seemed to have dissolved and been reduced
to a sticky black mush.
The P123BQ I found was in very poor condition. The
exterior appearance was truly discouraging: the front metal part of the
cabinet was marred by copious amounts of copper oxide, the once
transparent plastic knobs were dirty, yellowed and with faded writing,
the "Transistor" logo at the bottom was missing its central part, in
some places the fake leather covering the wood was peeling off, the red
plastic of the carrying handle was broken in the middle and the four
rubber feet under the cabinet seemed to have dissolved and been reduced
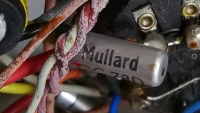
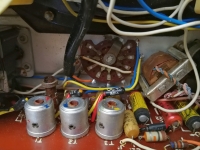
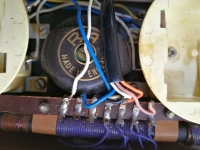
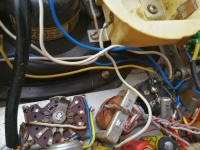
to a sticky black mush.The electronic part of the Pye P123 instead appeared in a little better condition. The electrical circuit components looked like the original ones and the seller had assured me that after trying to insert the batteries he was able to hear discharges and rustling coming from the speaker. Once a 6 V battery was connected to the circuit, I too tried to turn it on and to my surprise I was able to tune into a Medium Wave station. It was an excellent result, but the radio deserved better, a good sixty-four years had passed since its construction and the cabinet and certain electronic parts absolutely required an overhaul. To do a good job, therefore, it was necessary to extract the electronics from the cabinet and restore both properly. The layout of the parts was odd, with the circuit board positioned at the top, the speaker in the middle, and the ferrite core antenna at the bottom. The various parts were connected by innumerable copper wires covered in colored rubber. Before starting the work I took several photos, I made a drawing and I attached numbered labels to the wires to mark them, then I proceeded to unsolder them and remove the fixing screws and bolts to separate the parts. Looking at the printed circuit board I took note of the abbreviations of the Mullard transistors and then I started to desolder the Plessey electrolytic capacitors from the printed circuit board. Once measured with the ESR tester I had to mentally congratulate the manufacturer of these components because after so many years the capacity value was still quite acceptable, not so the leakage current, therefore I decided that they had to be replaced with new components. In this way, however, the vintage look of the device would have been compromised, so to save the appearance I undertook the solution of piercing the casings of the original capacitors and inserting new components of the same value inside. At equal values, the more modern capacities were much smaller than the ancient ones, therefore the operation would have been difficult but possible. With a little patience, using progressively thicker drill bits I was able to extract the old "electrolyte" and make holes of suitable diameter, in this way the "capacitors" operation was successful and once after re-soldering the components on the circuit and reconnecting the wires between the various parts of the radio, I turned on the device. To my great pleasure the Pye was still working, I hadn't caused any damage, on the contrary, the radio received very well, the sound volume was loud and the sensitivity very good. It was not necessary to calibrate the Intermediate Frequency transformers, they were fine like this. At that point I dedicated myself to restoring the cabinet. Using a rag that I dipped from time to time into a saucer where I had prepared an amalgam of coarse salt, water and vinegar, with a lot of patience I began to rub the metal front part of the piece of furniture that I had detached from the cabinet. It took a lot of "elbow grease" to get rid of the heavily oxidized part, but at the end I was able to almost completely remove the greenish plaque. Then I used a my wife's stolen spray cleaner to clean the faux leather and used glue to reattach certain parts of the upholstery. Four black rubber chair caps replaced the original feet and some red electrical tape served to somewhat tap the carrying handle. I still had to fix the frieze "Transistor". Well, I admit that the result wasn't exciting, but with a bit of self-hardening plasticine I managed more or less to recreate the letters "nsis" that were missing and to color them with a golden marker. The radio is old but is very sensitive. The Medium Wave range is almost deserted during the day now, but I was able to listen to a few stations. In the evening and at night things improve a lot and from the elliptical speaker come voices speaking in multiple languages. © IK3HIA 2023 |
|||||||
|
Immagini riprese
durante il restauro |
|||||||
 |
 |
 |
 |
||||
 |
 |
 |
 |
||||
|
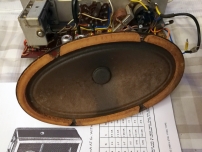
Sostituzione
dei condensatori elettrolitici con l'inserimento di nuove capacità
all'interno degli involucri originali.
|
|||||||
 |
 |
 |
 |
||||
 |
 |
 |
 |
||||
|
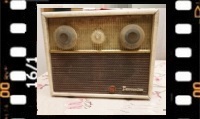
Video taken
after
replacing the electrolytic capacitors. |
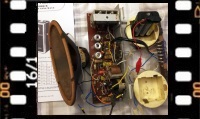 |
Video ripreso dopo la sostituzione |
|||||
|
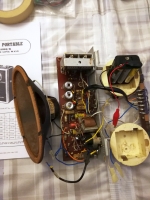
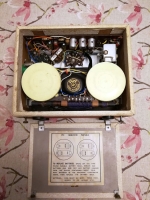
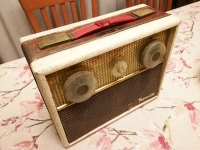
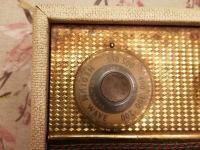
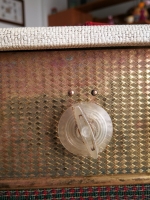
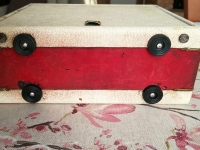
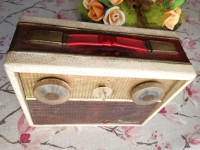
Aspetto
a restauro concluso.
|
|||||||
 |
 |
 |
 |
||||
 |
 |
 |
 |
||||
 |
 |
 |
 |
||||
 |
 |
||||||
|
Back to the top of the page >>
|
|||||||
|
|
Return to: Pye P123BQ Description |
|
Return to: IK3HIA home page |
|
Return to: Transistor Radio |
|
Go to: Transistor diagrams |